
4.3 Using SayMore
In this section, we review how to use SayMore for creating transcriptions, translations, and metadata, as well as for data management.
Getting Started with SayMore
- Download and install the latest release of SayMore (Note: SayMore is only available for Windows).
- Agree to the terms and conditions.
- You will be presented with a prompt asking you to Open (an existing project) or Create (a new project). Click Create new, blank project.
- Once you have created a new project, you will be prompted to name it.
You will see three tabs:
- Project. Use this tab to fill in metadata about the project, including your name and contact information.
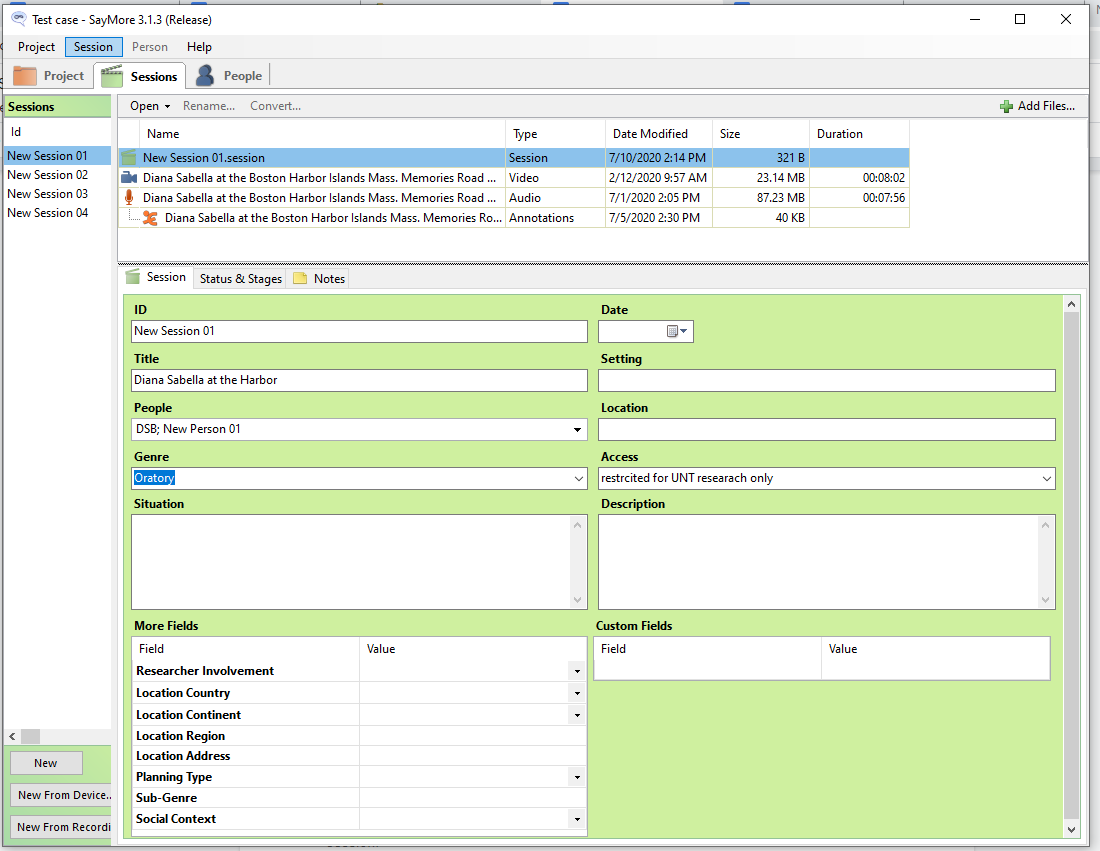
- Sessions. Use this tab to build folders of Sessions. A Session is a group of files and metadata pertaining to a single recording.
- People. Use this tab to record demographic and other relevant information about the people involved in the project.
Organizing files in Sessions
- Add a new session by clicking New in the bottom left.
- When you select the Session from the list in the top right panel, you will get a prompt below to provide a title and add metadata.
- Import video and audio files to the Session by clicking Add Files in the top right.
SayMore for Transcription and Translation
Once you have added audio and/or video files to a session and input relevant metadata, you are ready to add transcriptions and translations.
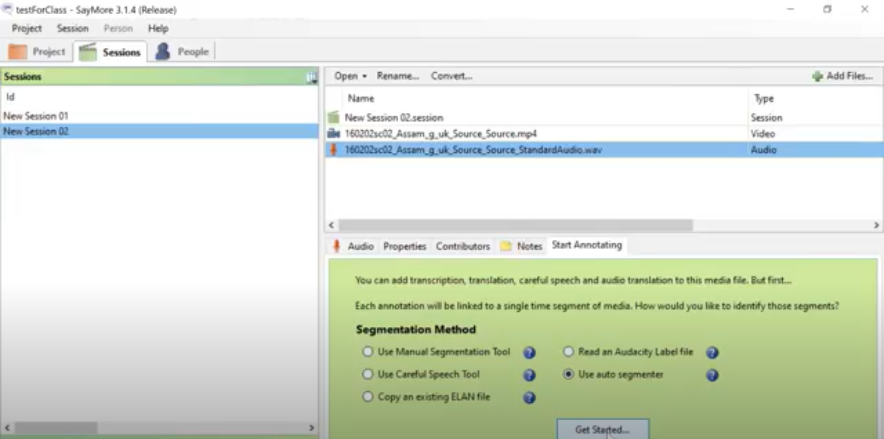
- Select the Start Annotating tab. The program will ask you to Convert the file, which will strip the audio from the video. You will see both the video file and the .wav audio file in your list of files for the selected Session.
- The program will prompt you to select a Segmentation Method. In order to expedite the process, select AutoSegment, then Get Started. SayMore will automatically segment the sound file into smaller chunks using pauses as breaks.
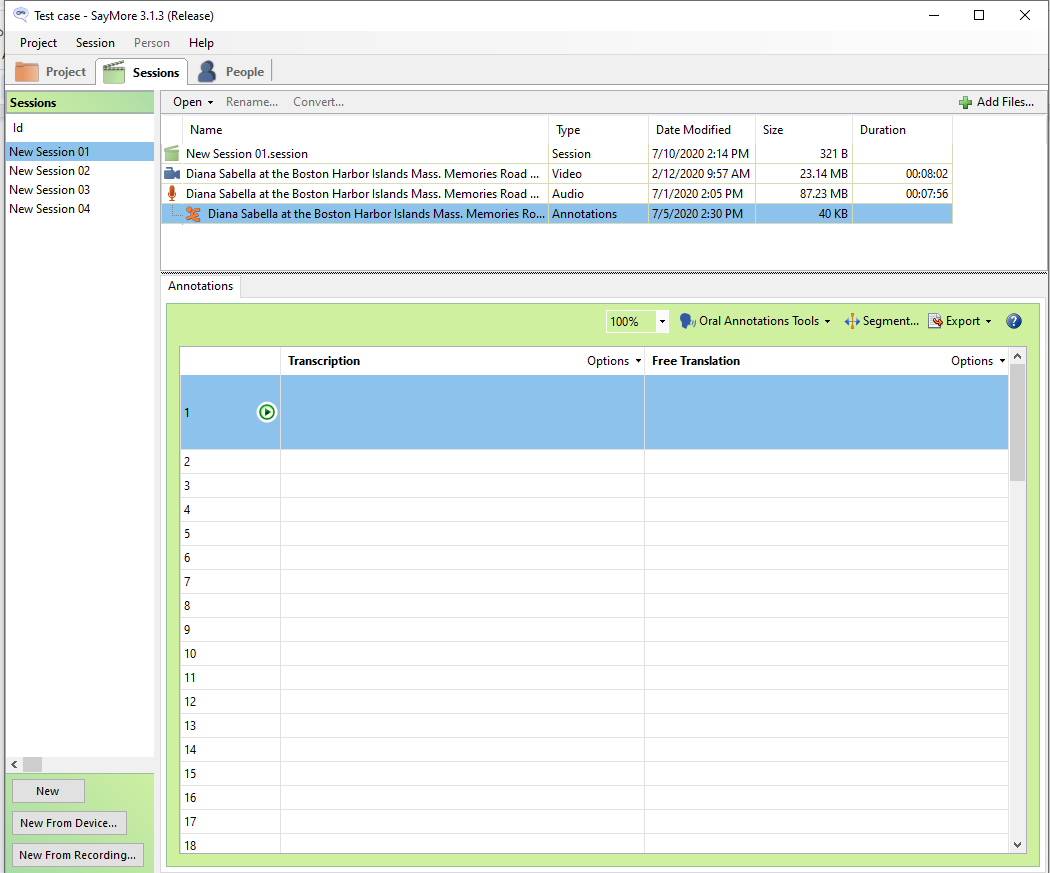
Adding Transcriptions and Translations
The Annotations tab for the session now consists of a list of automatically segmented chunks of audio in a list. The list has three columns
- Audio. The first (unlabeled) column numbers each chunk of audio sequentially. When you select a row, a Play button will appear in this column. Click it to listen to the audio chunk.
- Transcription. Type your transcription of the audio chunk in this column.
- Translation. Type your translation of the audio chunk in this column.
Your spelling does not have to be perfect, and your translations do not have to be expert. These are first-pass transcriptions and translations, which will improve as the project progresses.
Exporting your transcriptions and translations
In the top right of the Annotation panel, there is an Export drop-down menu. From here you can choose to export your Session as an .eaf file (for use in ELAN), a .txt file, or a .srt (subtitle) file for creating videos with subtitles. Due to its broad functionality, we recommend exporting your work in .eaf format. You can also export your work as FLEx text for import into FLEx of the transcription and free translation.